
Exporting Assets From Unreal
Description:
Exporting models and textures out of Unreal Engine to be used in other 3D authoring apps.
Cons:
• Assigning textures to corresponding materials can be a lengthy process. I would recommend exporting the models you need to use.
Exporting Textures:
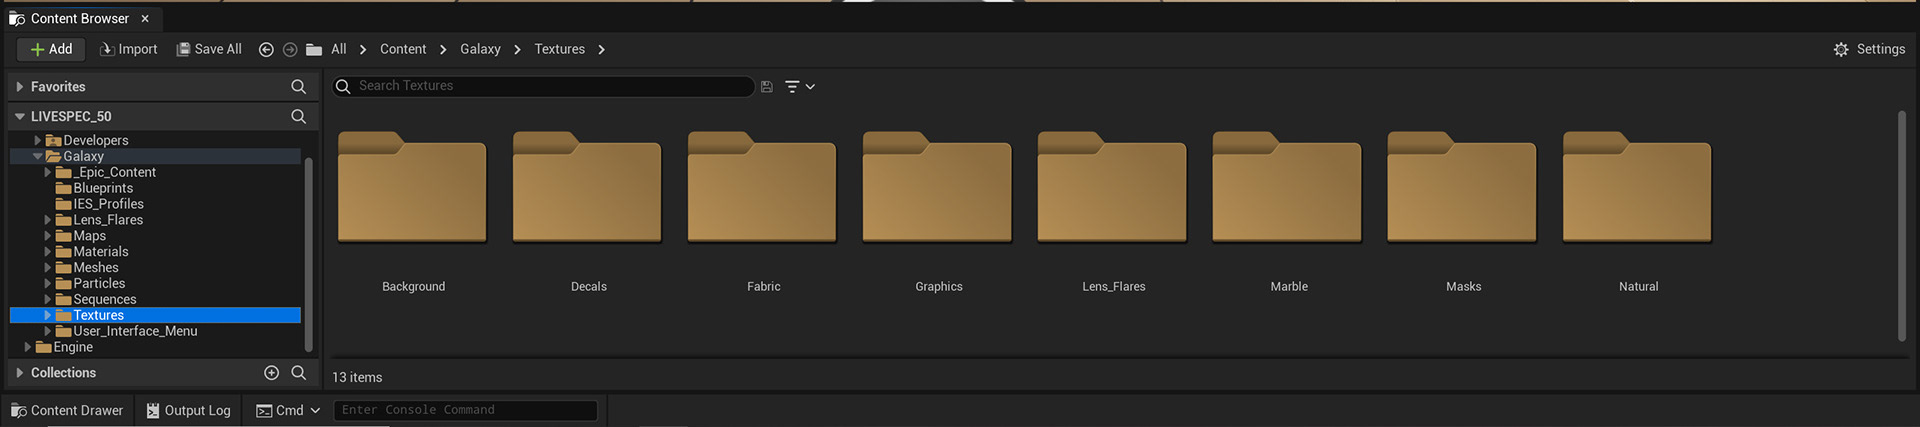
1. Create a new Spectrum Galaxy project to export assets.
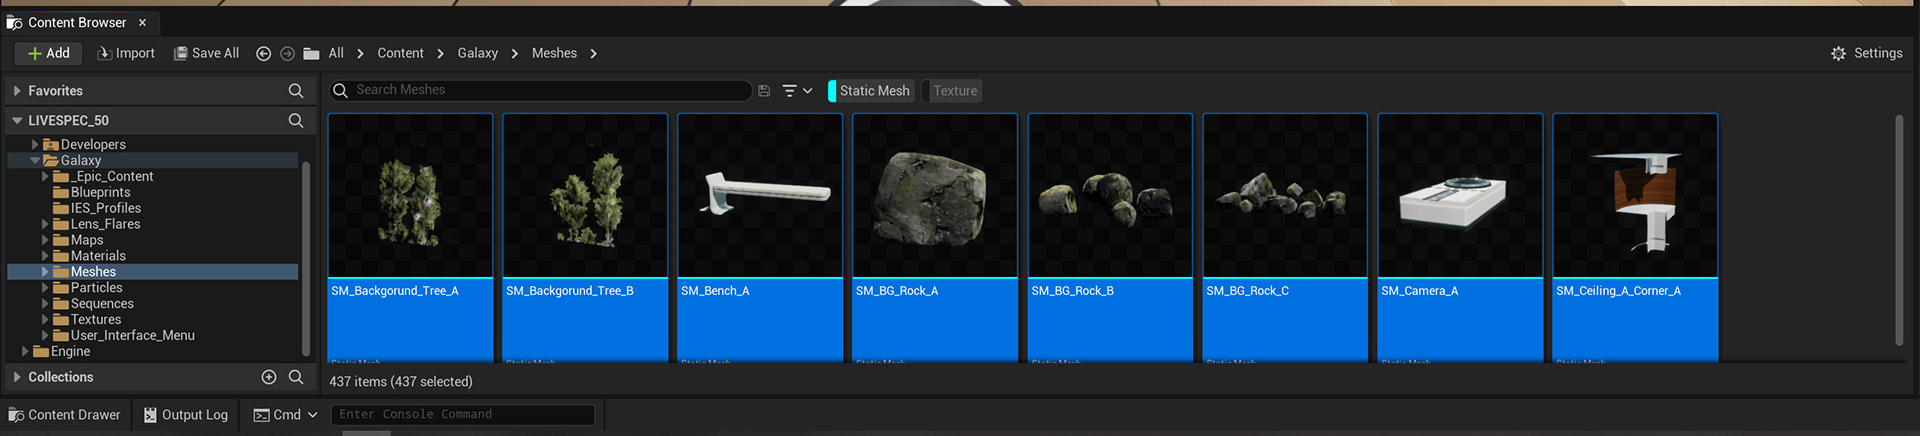
2. Once you create the project, please open it and navigate to the “textures” folder (under Galaxy).
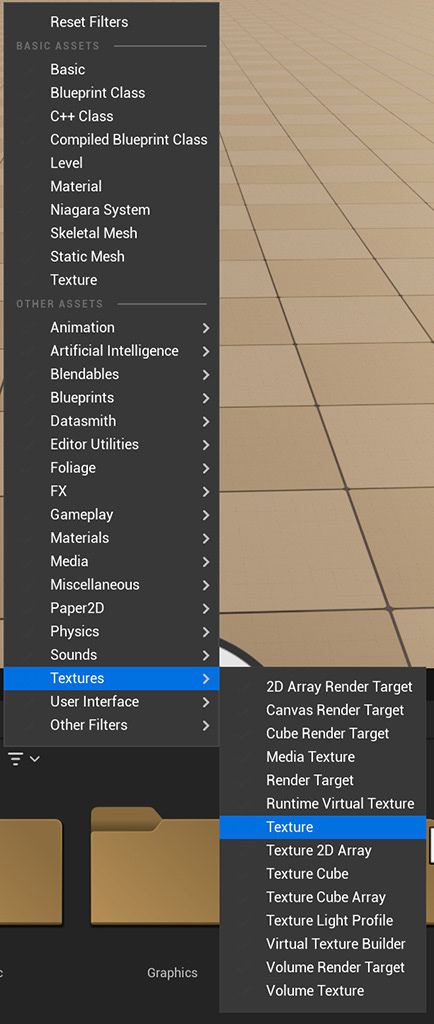
3. Apply a texture filter to the content browser in order to see all the textures at once.
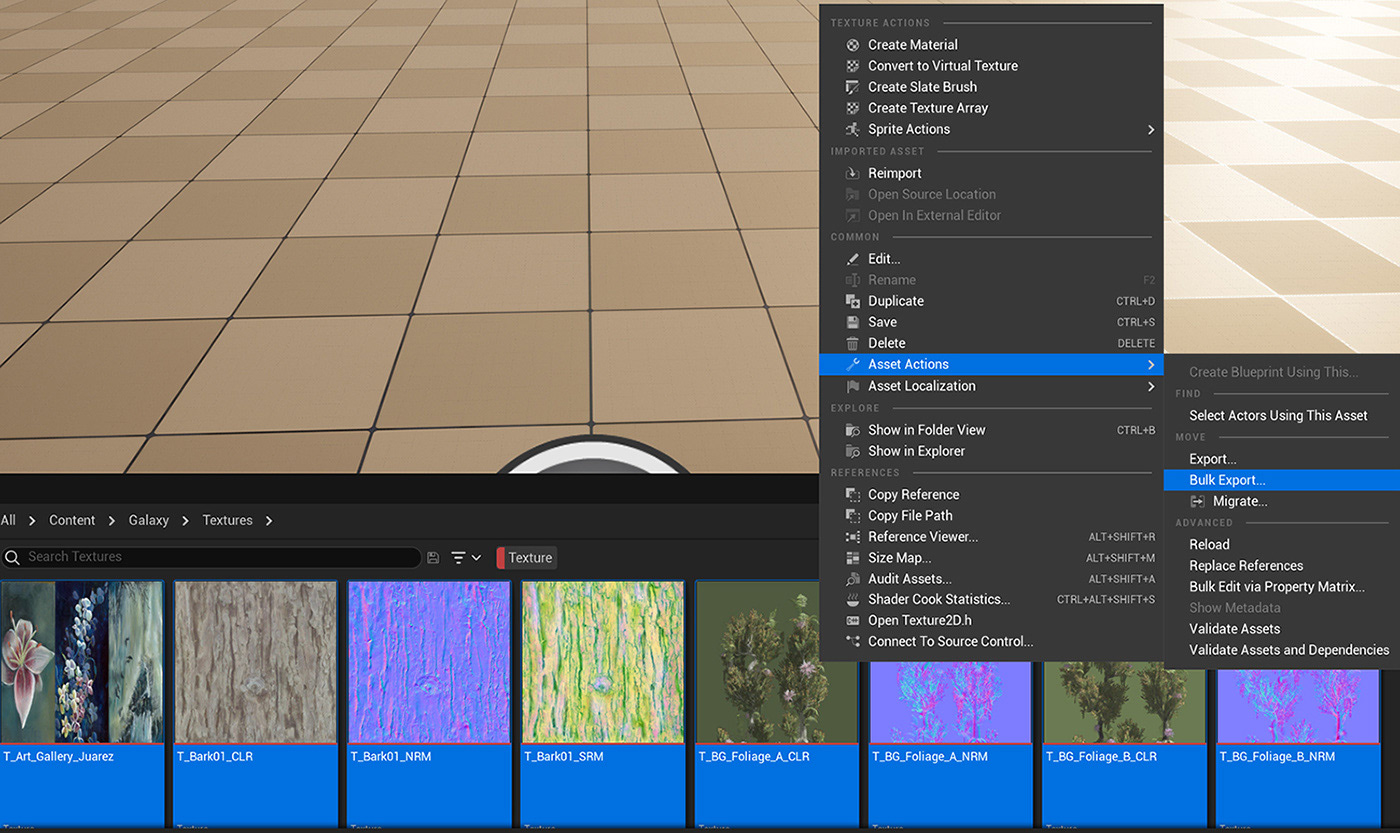
4. Select all the textures, right click, and navigate to “Asset Actions” and select “Bulk Export). You’ll need to select a folder on your computer for these assets.
Exporting Meshes:
Unreal Engine will export meshes with triangles, so you'll need to use your 3D authoring app to convert these into quads.
1. Navigate to the "Meshes" folder (Under Galaxy).
2. Apply a "Static Mesh" filter and remove the "Texture" filter we previously had in place.
3. With all the meshes selected, right-click, and navigate to “Nanite”, then select “Disable”. I’ve discovered that exporting nanite meshes from unreal can produce models that do not contain the high fidelity geometry of the originals (Tested in 11/11/2022).

4. Once this process is complete, please “Save All”.
5. With all the meshes selected again, please “Bulk Export” into the same folder you exported your textures into. Unreal Engine will create the appropriate folder structure for these assets.
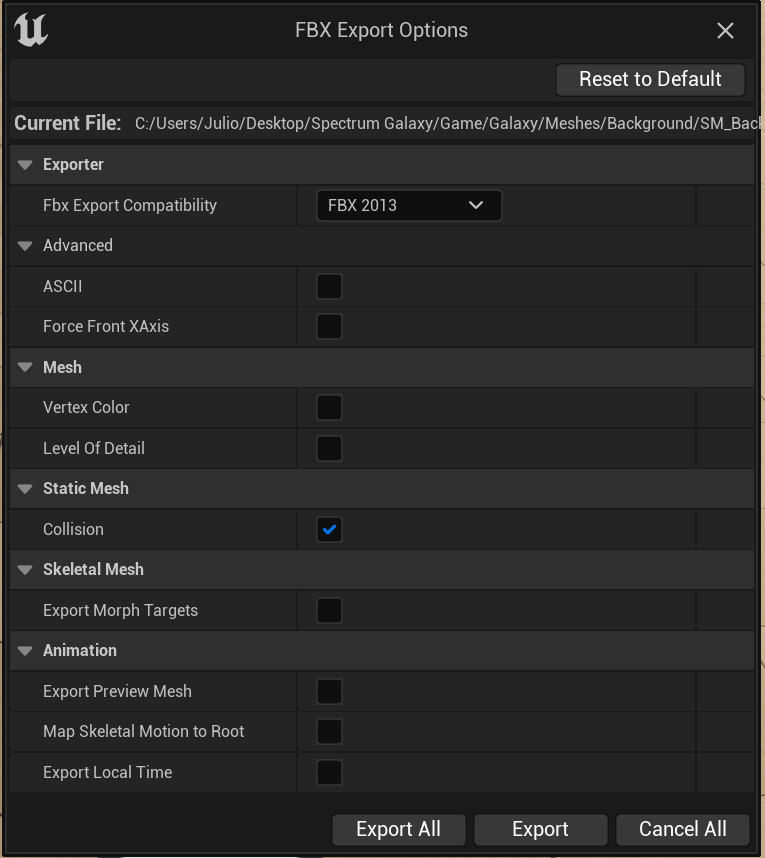
These are my FBX settings, I disabled everything except “Collision” and I used FBX 2013 for compatibility. Change the FBX version and remove collision if you do not need it.
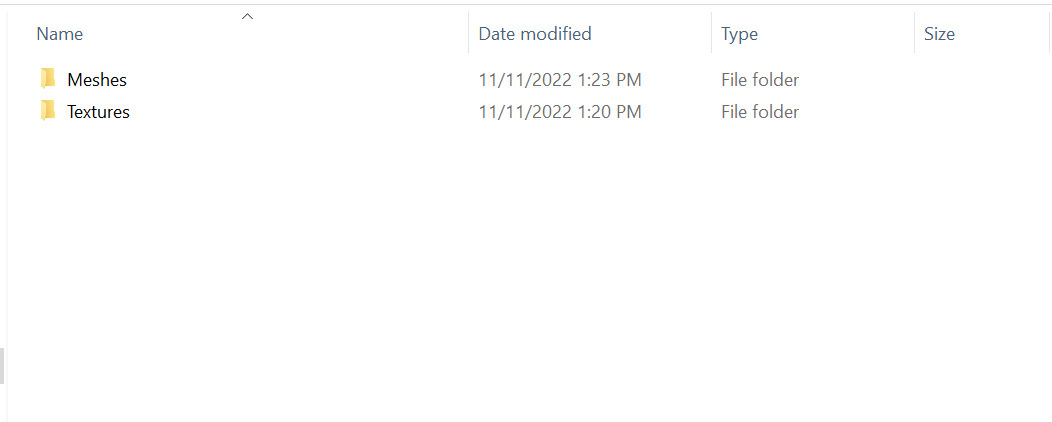
As you can see here, Unreal Engine organized the assets in the same folder structure present in the asset browser.
This next step depends on your application. I’m using 3ds Max 2020 for the steps below, but please look into the equivalent feature on your 3D authoring app if you are not using 3ds Max.
Converting triangles into quads.
1. In 3ds Max, right click on the imported assets and covert them into an editable poly.
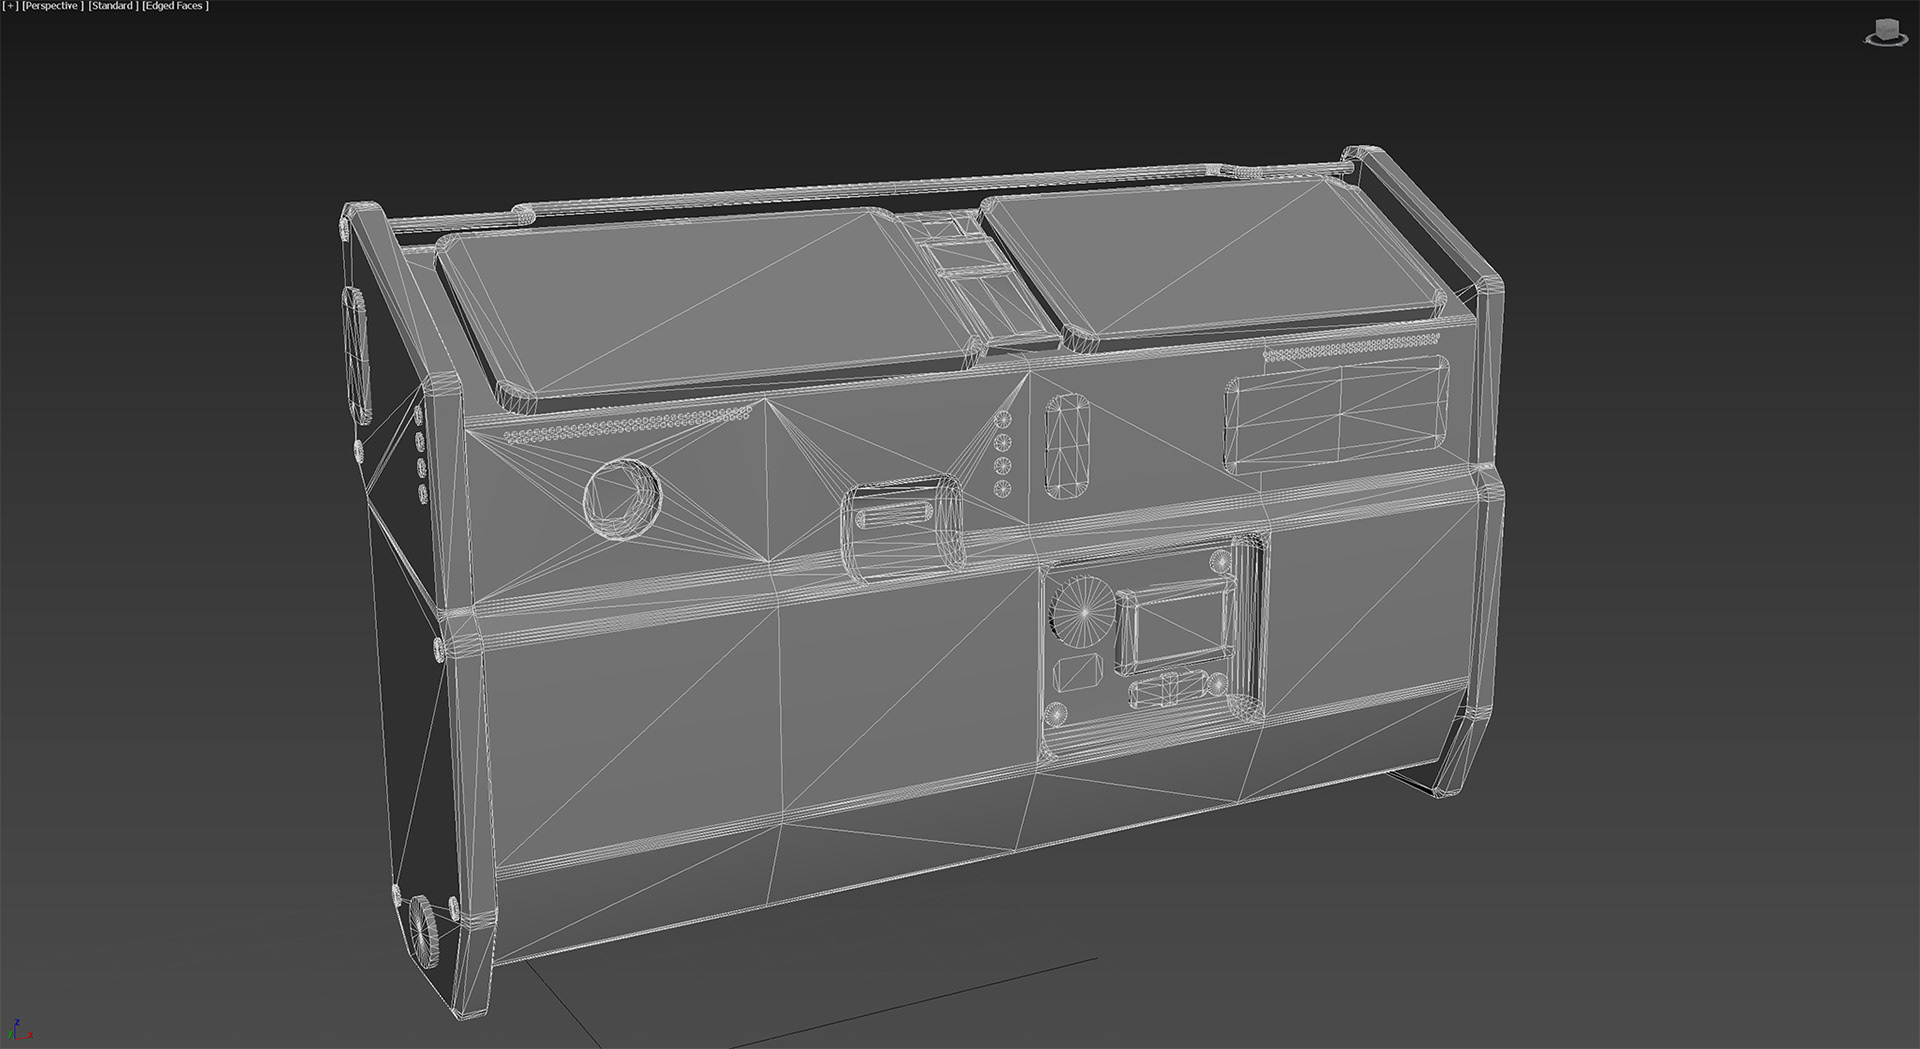
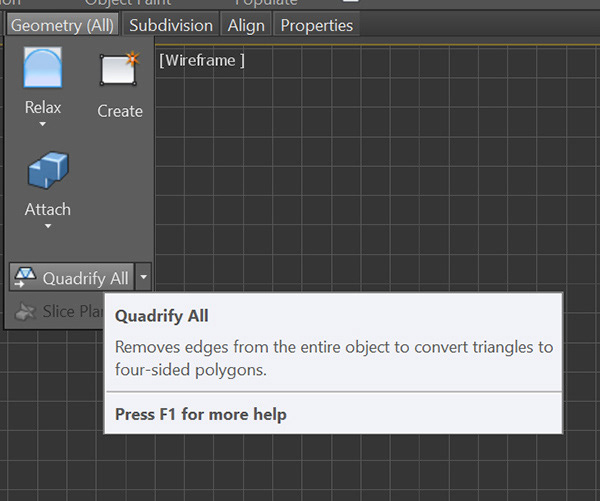
2. Once the asset is an editable poly, you’ll find new sub menus become available. The feature we are using is called “Quadrify All” and you’ll find this under “Geometry (All)”.
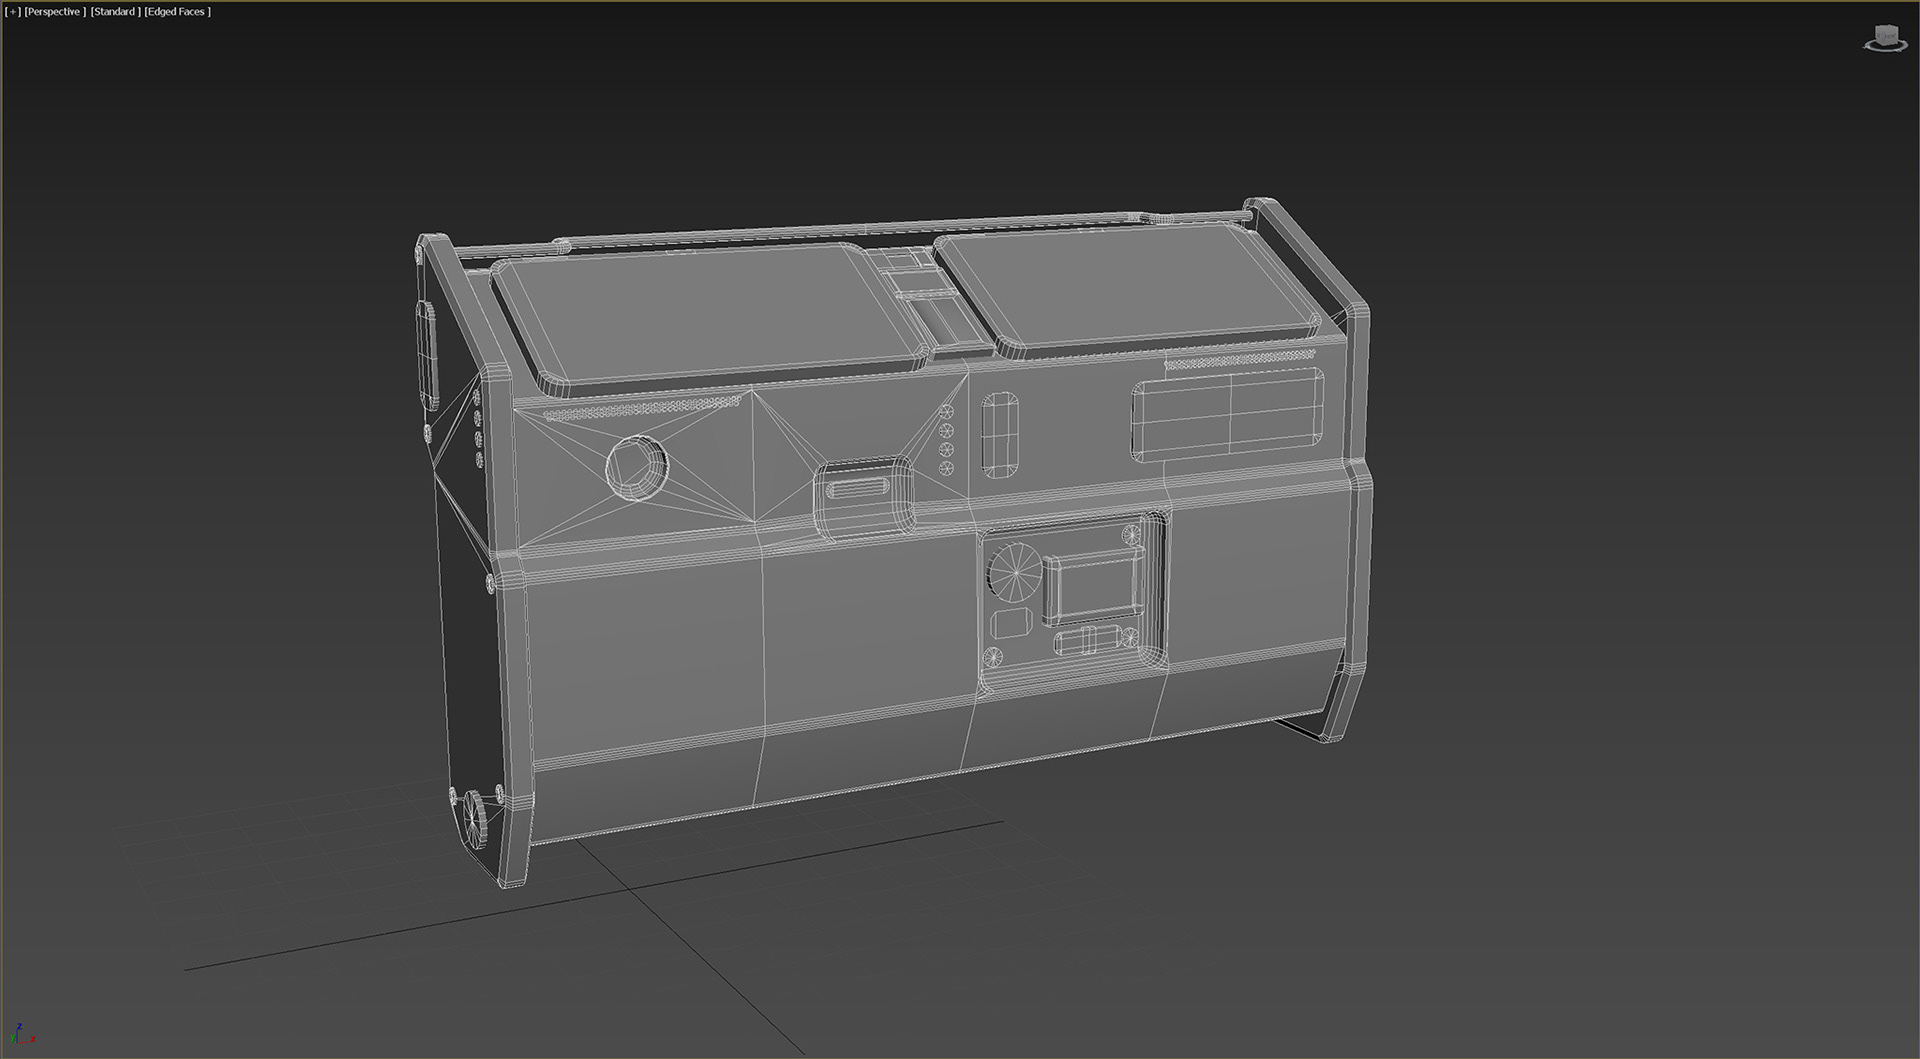
The asset below results from that conversion. The quad layout is not exactly the same as the original assets, but it’s very close. If you want to make modifications to this asset or make new assets from existing ones, the more user-friendly quads are ideal.
Editing Materials:
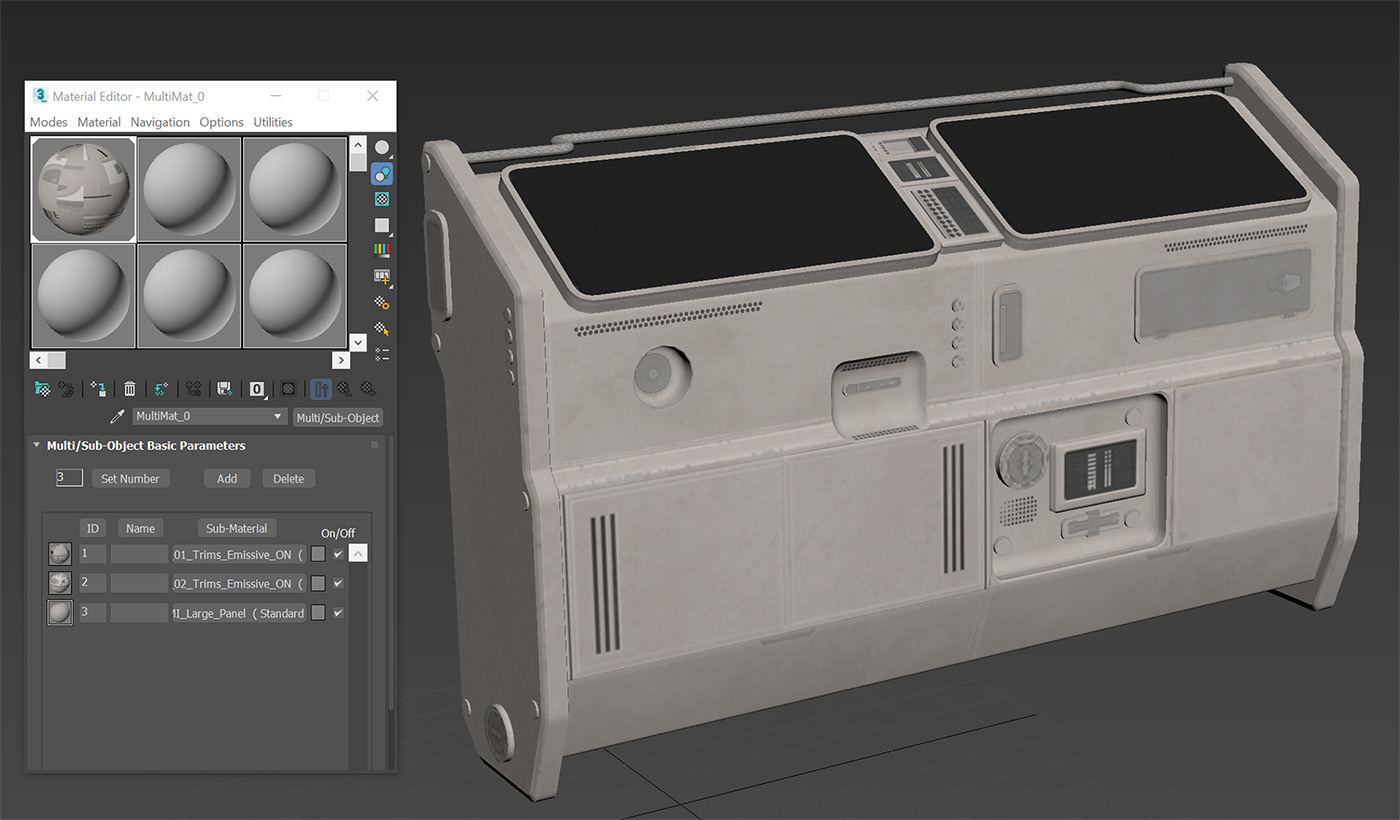
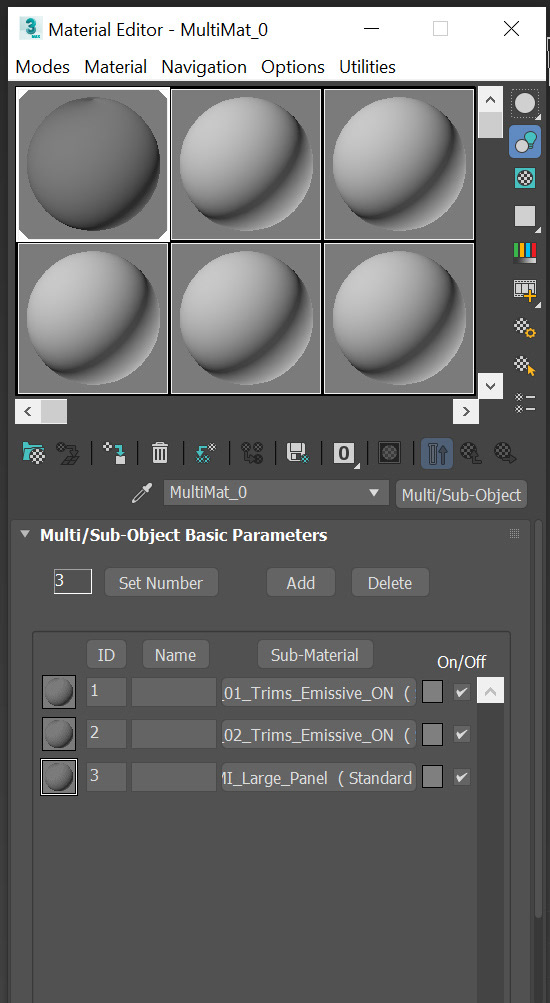
1. Open the material editor and use the eye-drop sample tool to extract the material from the desired mesh. Here, I selected the console above while the eye-dropper tool was active.
2. Please note how the sampled material is a “Multi/Sub-Object” material. Here, this material contains three sub-materials within.
3. Navigate to each sub-material one at a time. Here you will need to plug in the textures into their appropriate channels. I would recommend having Unreal Engine open for reference while doing this.
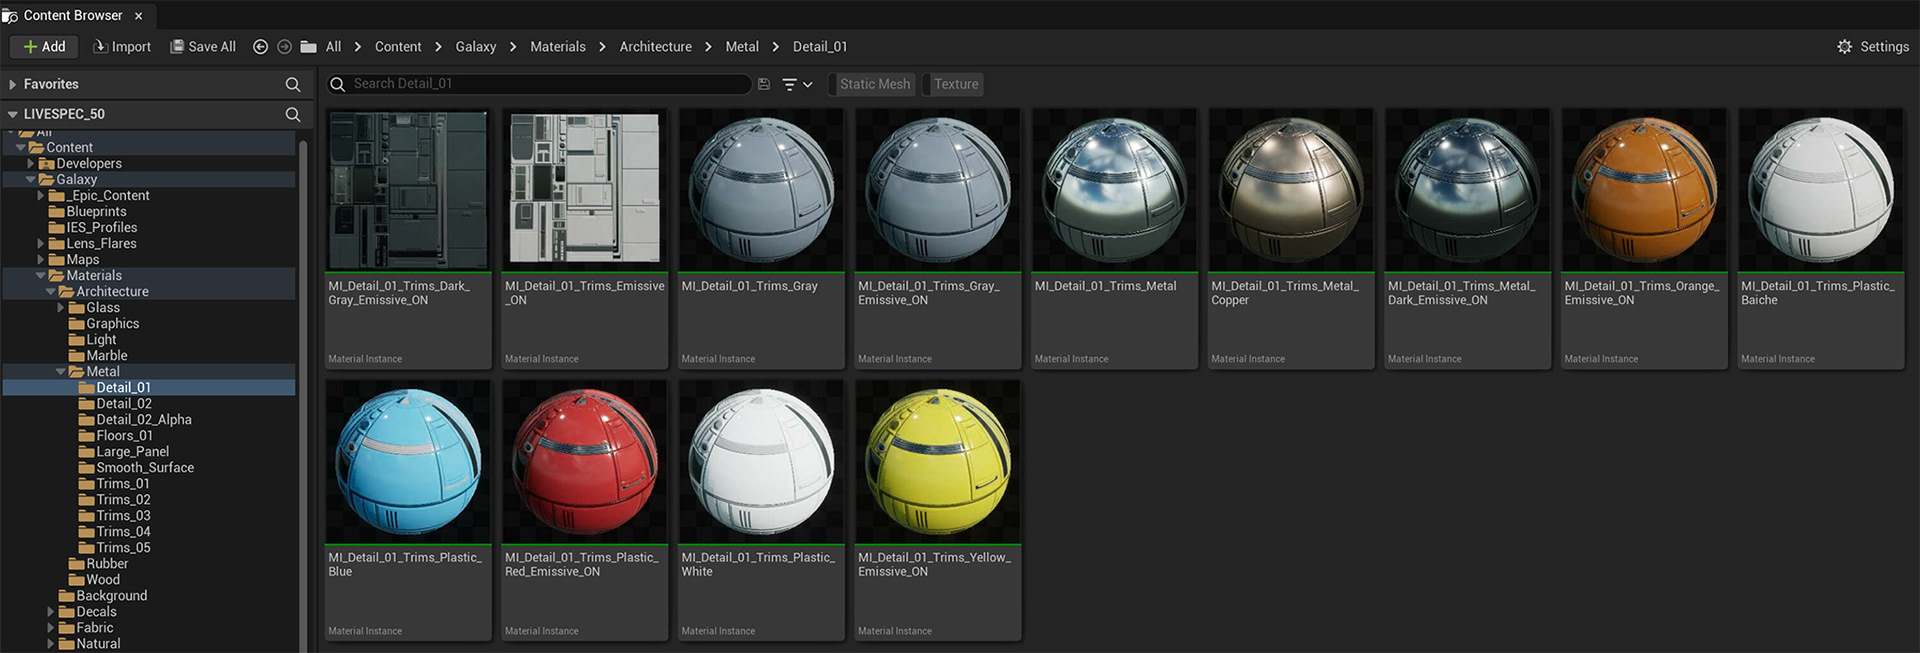
TIP: All material instances of the same name use the same textures, I made the multiple material instances in unreal to allow color variety and to enable metallic textures.
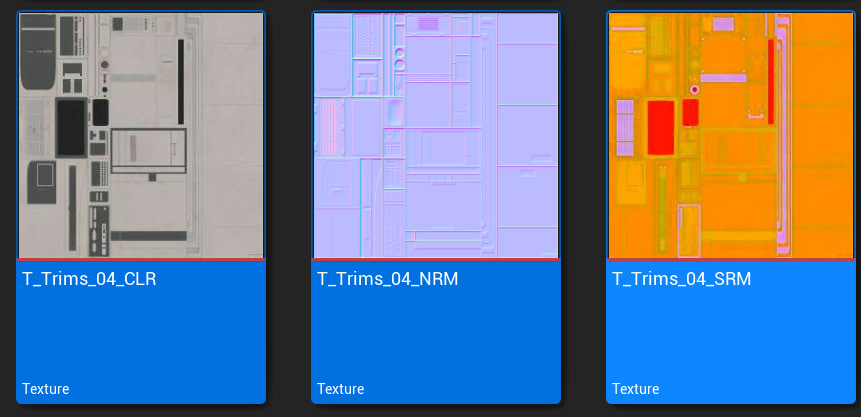
As you can see in the image below, all the material instances labeled “MI_Detail_01_Trims” use the same textures. So you won’t need to have many materials in your 3D authoring app unless you would like to have color variants like in Spectrum Galaxy.
These are the textures that correspond to the material instances shown above. Please note that the texture names are not exactly the same as the material names. The material names changed later in the project’s creation in order to provide more user friendly names.
As a final note: For instructions on how to apply textures to materials on your DCC app, please refer to its documentation.