
Setting Up Virtual Textures
Description:
Switching between mip-based texture streaming to virtual textures.
Pros:
• The primary advantage of virtual textures is that the game only streams the textures that are visible on the screen.
• Another advantage is that unlike mip-based streaming, virtual texture does not use a distance-based algorithm.
Cons:
• As of 9-4-2022, virtual textures do not support alpha masks and light projection textures. So we will exclude these textures from this conversion process.
• Using virtual textures can introduce redundancy, as textures that need to be assigned to virtual texture material nodes and non-virtual texture material nodes need to be duplicated. Producing two versions of the same texture, a virtual and normal version. Thankfully, we only duplicate 3 textures in the process below.
Enable Virtual Textures:
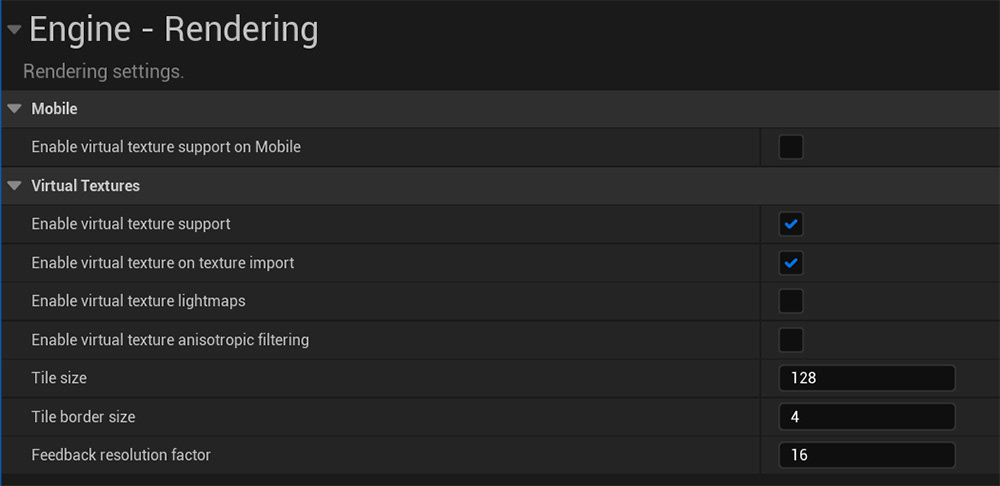
Spectrum Galaxy uses mip-based texture streaming by default. UE provides an alternate texture streaming method called virtual textures. To enable this:
1. Please open the project settings, search for virtual textures, and check-mark “Enable virtual texture support”. You’ll need to restart the editor.
Preparation Work:
Because virtual textures do not support alpha masked material nodes, we'll need to take the following steps in order to ensure masked materials do not produce errors after the conversion process.
Warning: not doing the following steps properly results in gray checkerboard materials or other unexpected results.
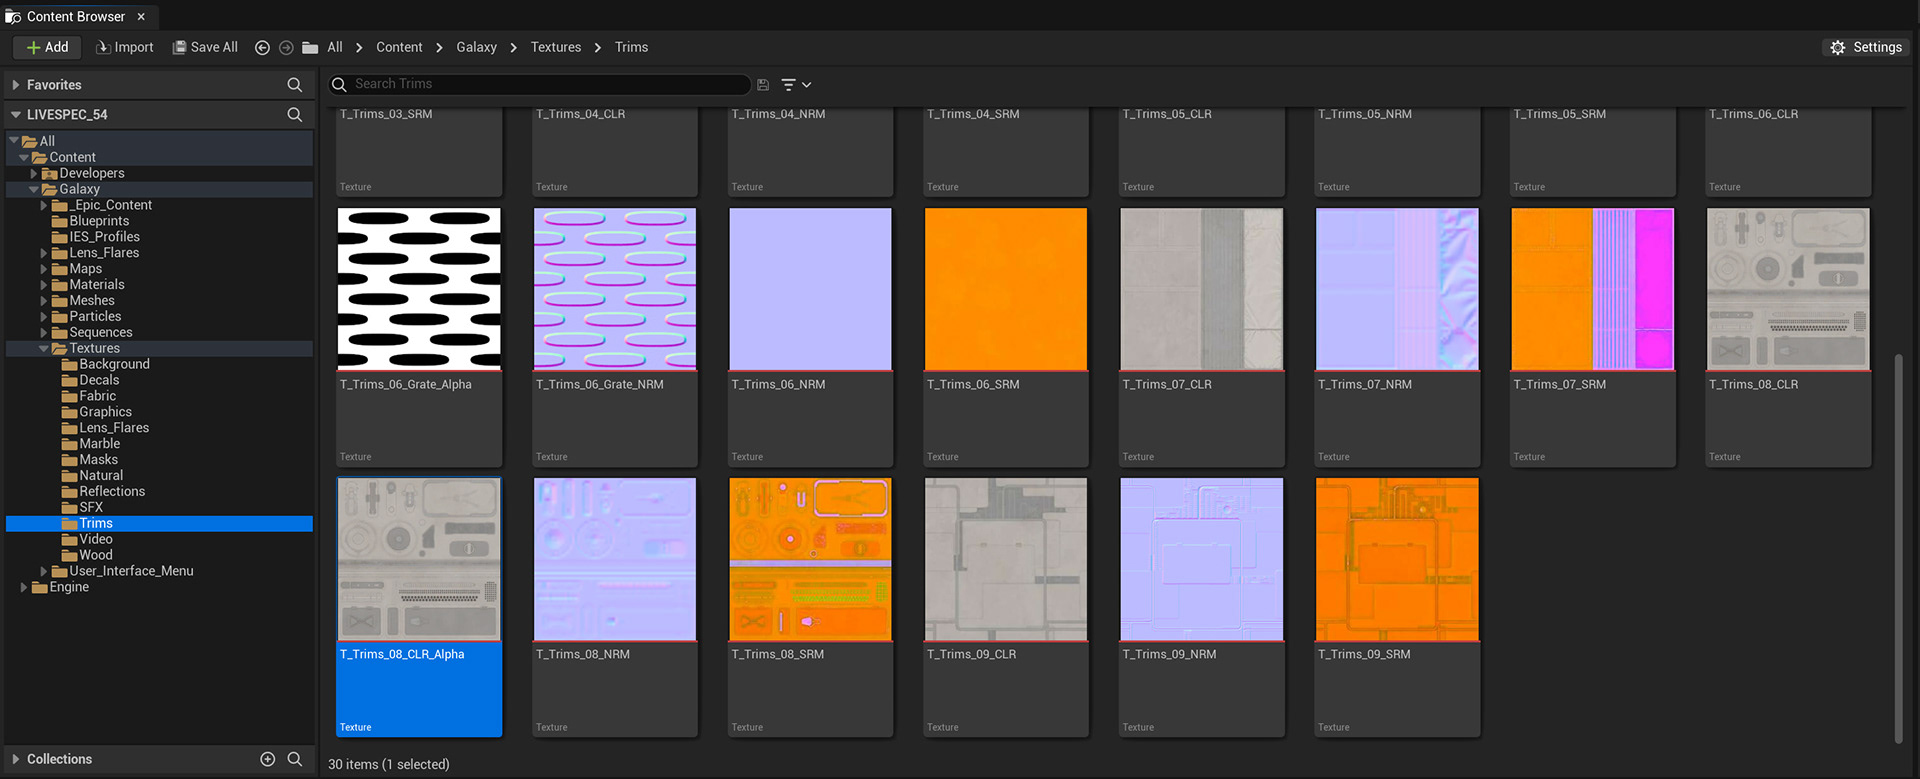
1. On the content browser, navigate to Galaxy->Textures->Trims.
2. Duplicate "T_Trims_08_CLR" and rename the duplicate to "T_Trims_08_CLR_Alpha"
3. On the content browser, navigate to Galaxy->Materials->Architecture.
4. Open "MAT_Trims_Master_Masked"
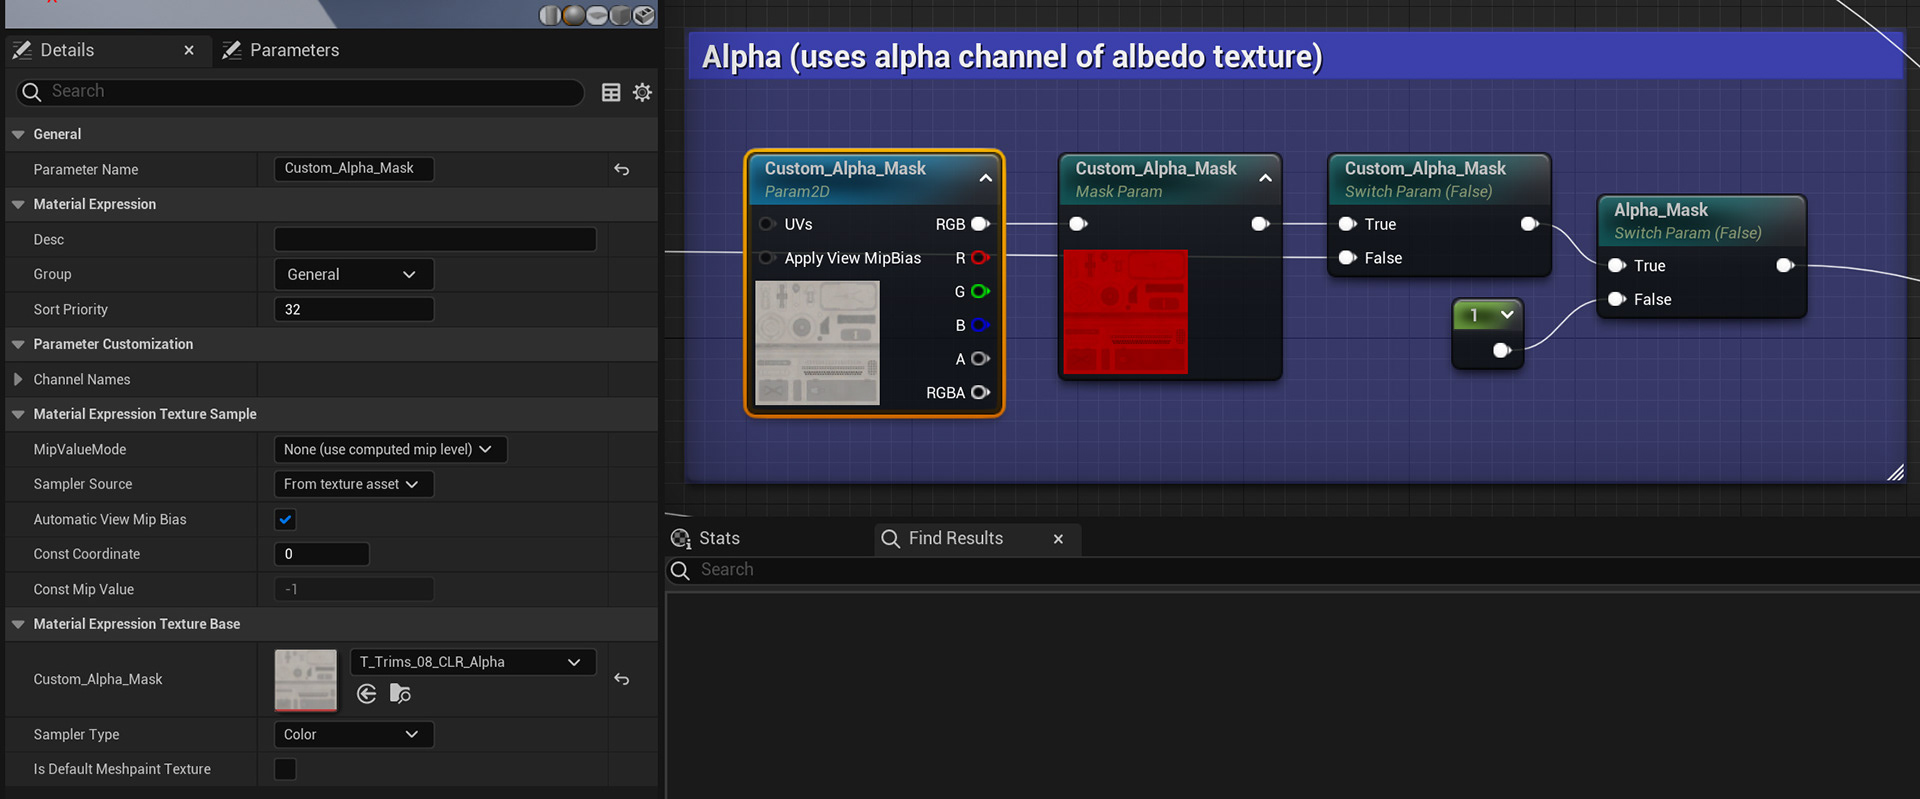
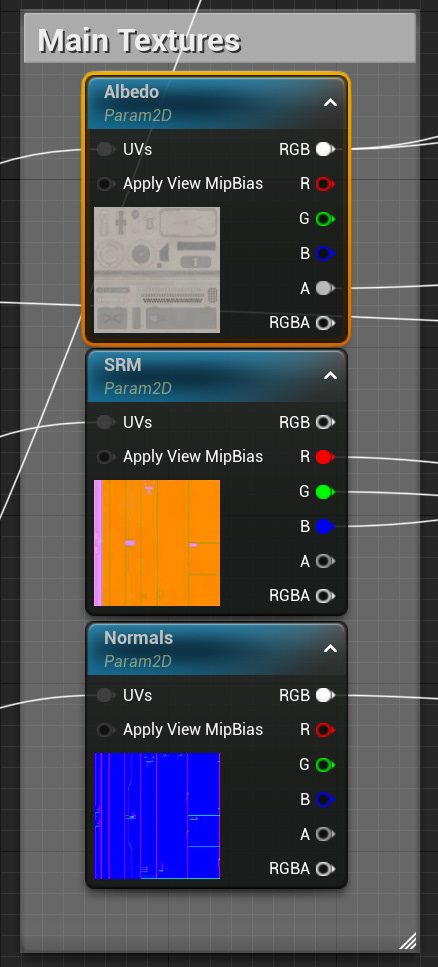
5. Locate the alpha section and select the "custom_alpha_mask" 2d Parameter node.
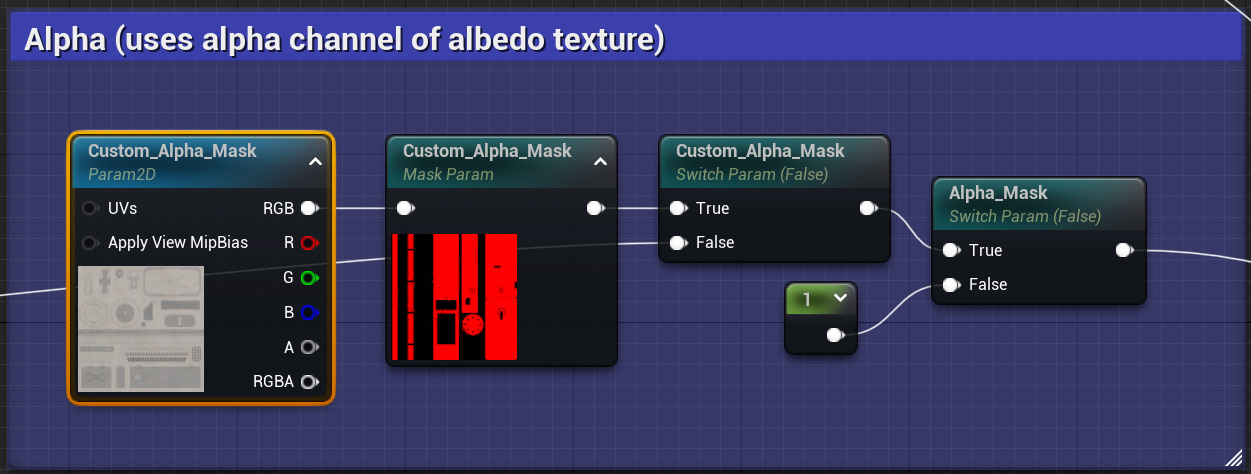
6. Replace the texture assignment with the new texture that was just created "T_Trims_08_CLR_Alpha".
7. Replace the texture assignment on the "Albedo" 2D parameter node in the main textures section with the new texture that was just created (T_Trims_08_CLR_Alpha). Then save and close the material editor.
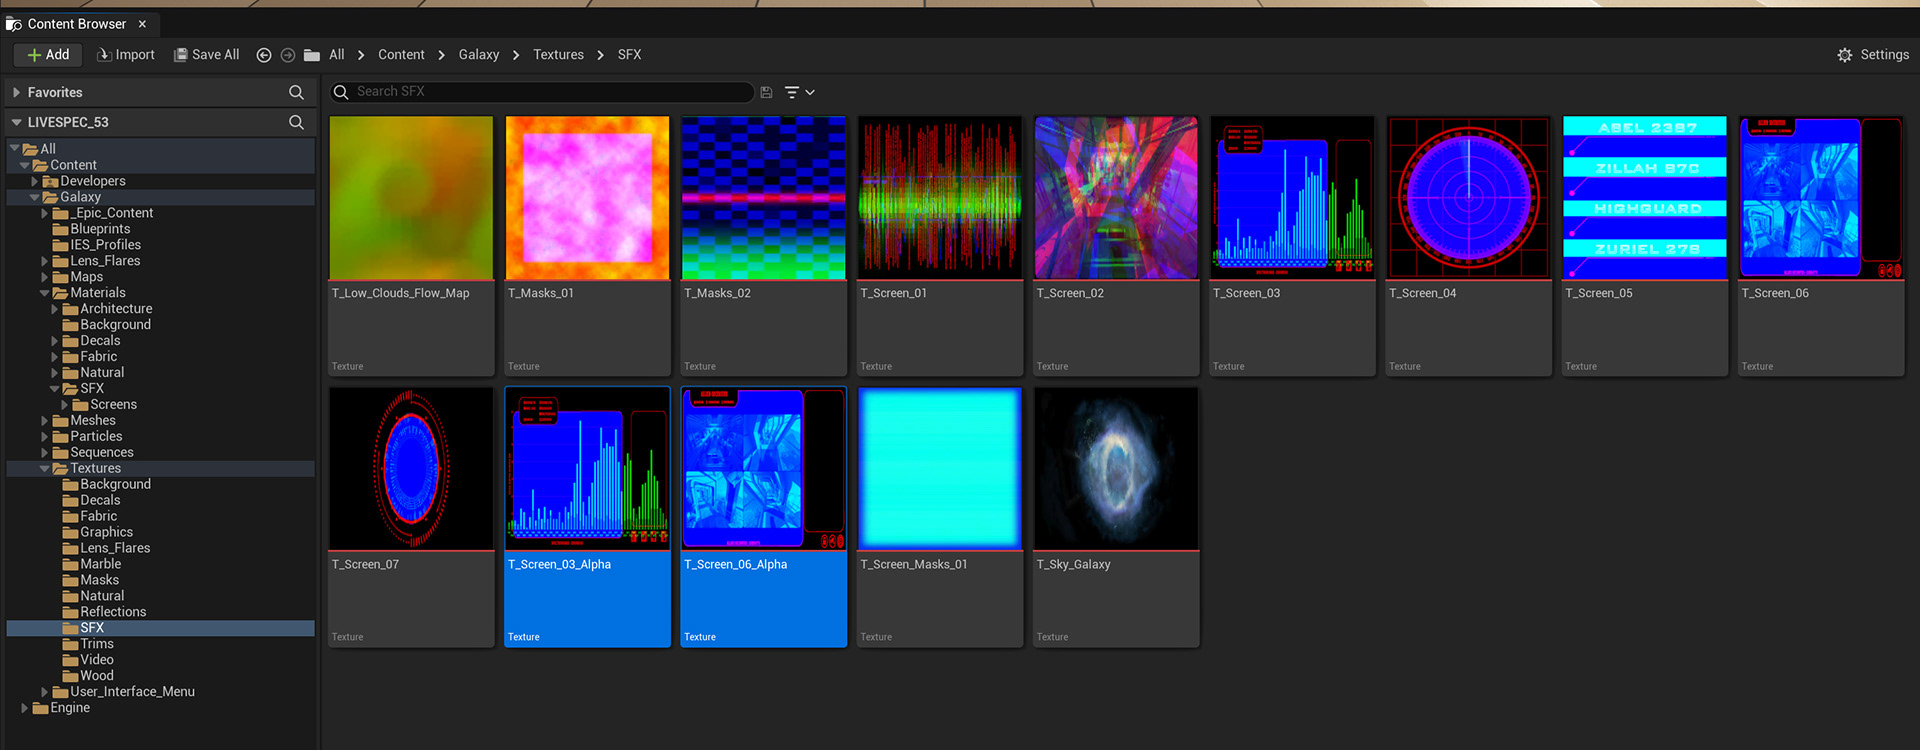
8. On the content browser, navigate to Galaxy->Textures->SFX.
9. Duplicate "T_Screen_03" and "T_Screen_06" rename the duplicates to "T_Screen_03_Alpha" and "T_Screen_06_Alpha"
10. On the content browser, navigate to Galaxy->Materials->SFX.
11. Open "MI_Design_Details_01" and "MI_Design_Details_02" (this will produce two tabs in the material instance editor).
12. Update the "Custom_Alpha_Mask" assignment each material in order to point to the new alpha textures we just duplicated. Then save and close the material instance editor.
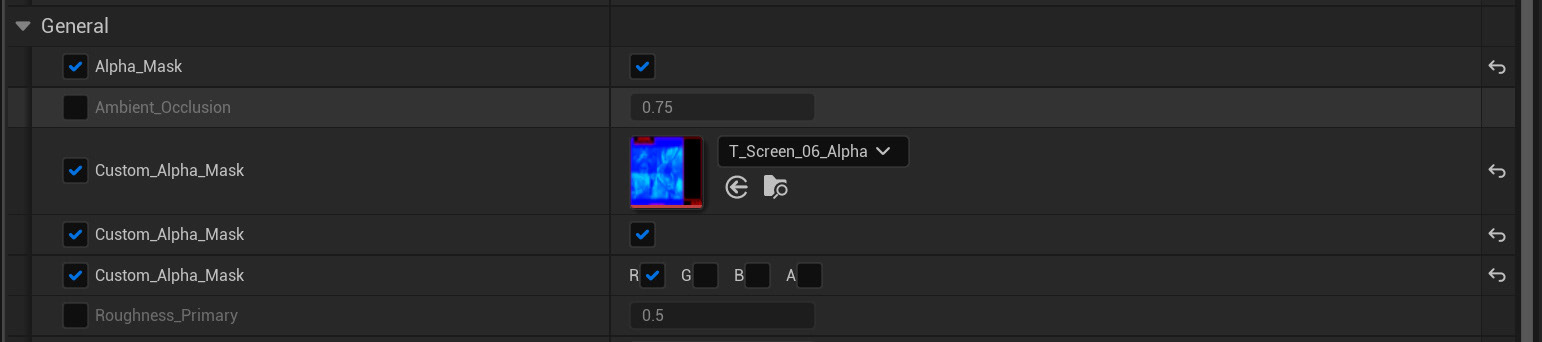
Update assignments from "T_Screen_03" to "T_Screen_03_Alpha" and "T_Screen_06" to "T_Screen_06_Alpha"
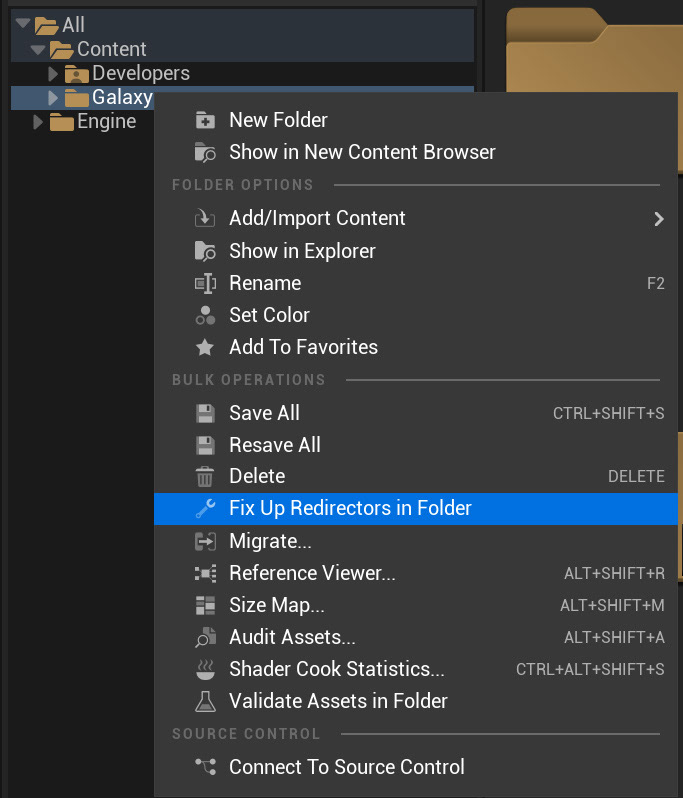
12. Before moving to the conversion process, select the "Galaxy" root folder, right click, and select "Fix up redirectors in folder".
13. File->Save all
Convert Normal Textures to Virtual Textures:
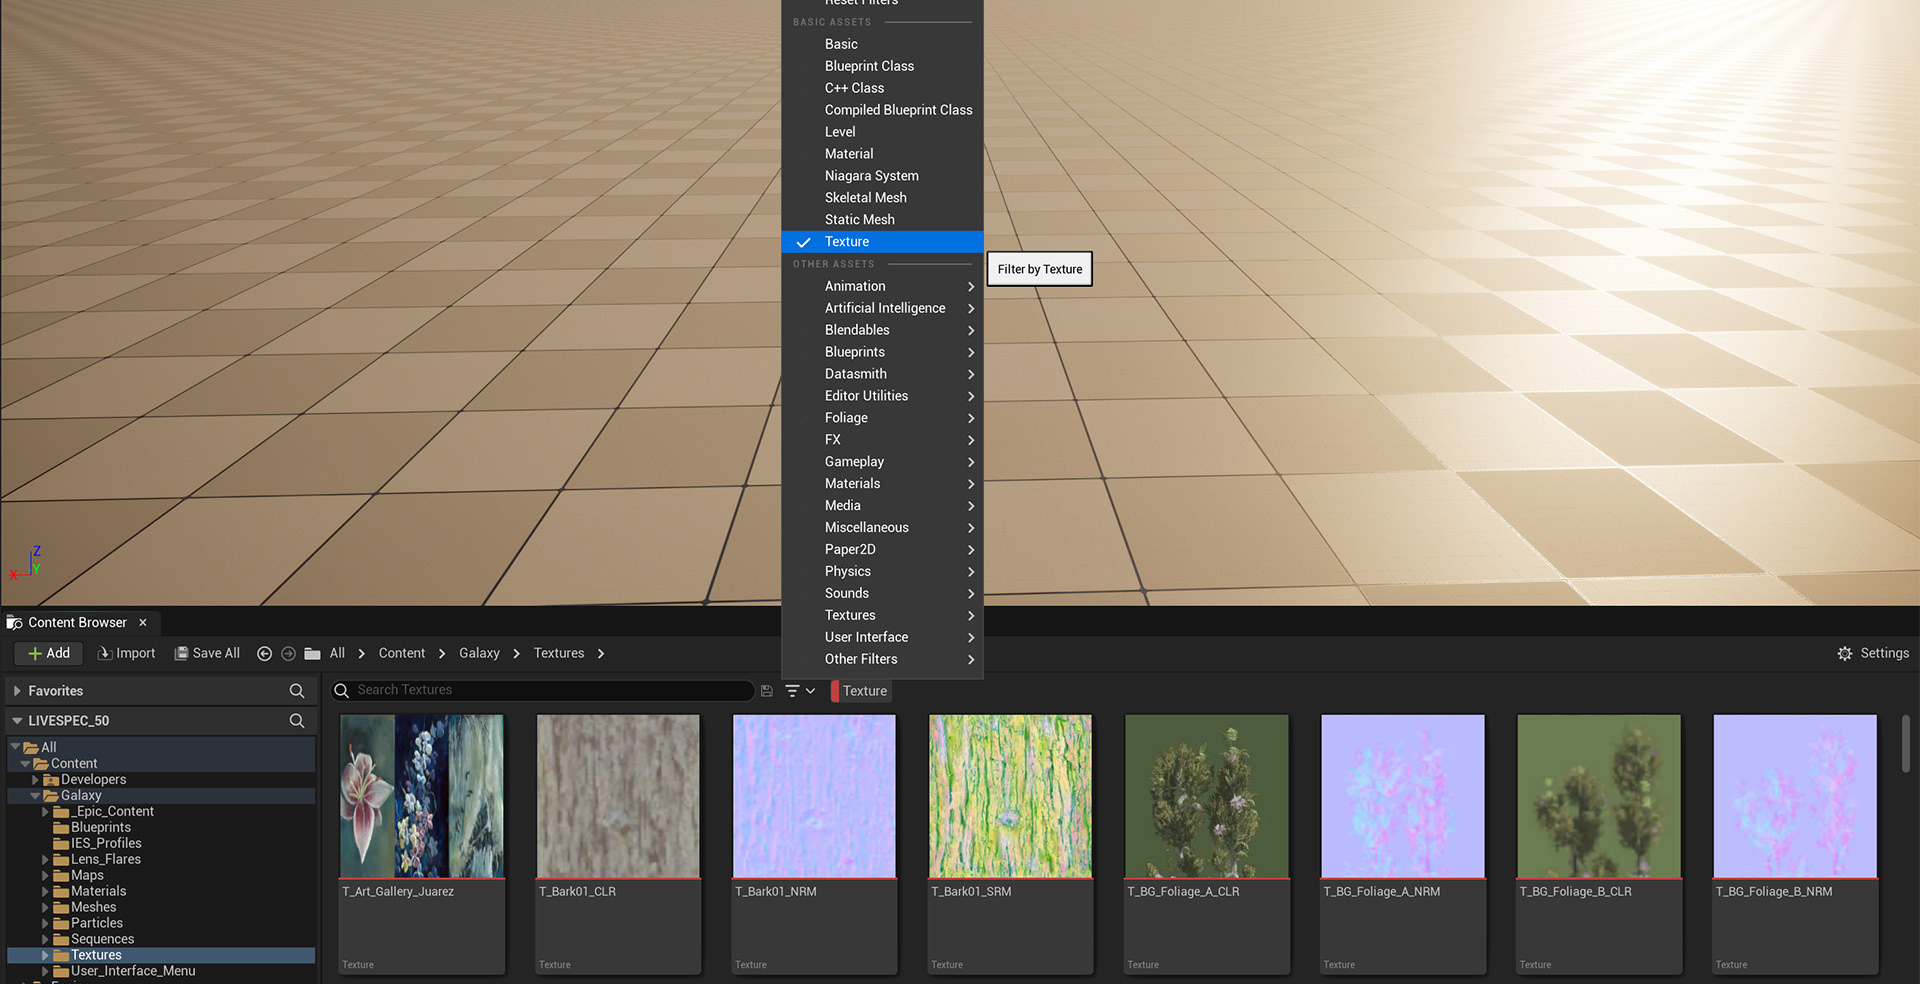
1. On the content browser, navigate to the root "textures" folder.
2. On the right of the content browser search box, add a texture filter. This will allow you to see all the textures without the folder hierarchy. It will also exclude non-texture assets.
3. Use Ctrl+A to select all the textures in the right pane. You might need to select one texture first to avoid selecting all directories on the left pane.
Warning: not doing the following steps properly results in gray checkerboard materials or other unexpected results.
4. Critical Step: You'll need to de-select the following textures by Ctrl+clicking them:
Alpha Mask Usage:
• T_BG_Foliage_A_CLR
• T_BG_Foliage_B_CLR
• T_Branches_01_CLR
• T_Decal_Puddle_Masks
• T_Grass_Flower_CLR
• T_Grass_Flower_Masks
• T_Rubber_CLR
• T_Screen_03_Alpha
• T_Screen_06_Alpha
• T_Trims_06_Grate_Alpha
• T_Trims_08_CLR_Alpha
• T_Tropical_Plant_CLR
• T_Water_Colors
Light Projection Textures:
• T_NasaGraphics_Light_Projection_A
• T_NasaGraphics_Light_Projection_B
• T_NasaGraphics_Light_Projection_B_Desaturated
• T_NasaGraphics_Light_Projection_C
• T_NasaGraphics_Light_Projection_D
• T_NasaGraphics_Light_Projection_E
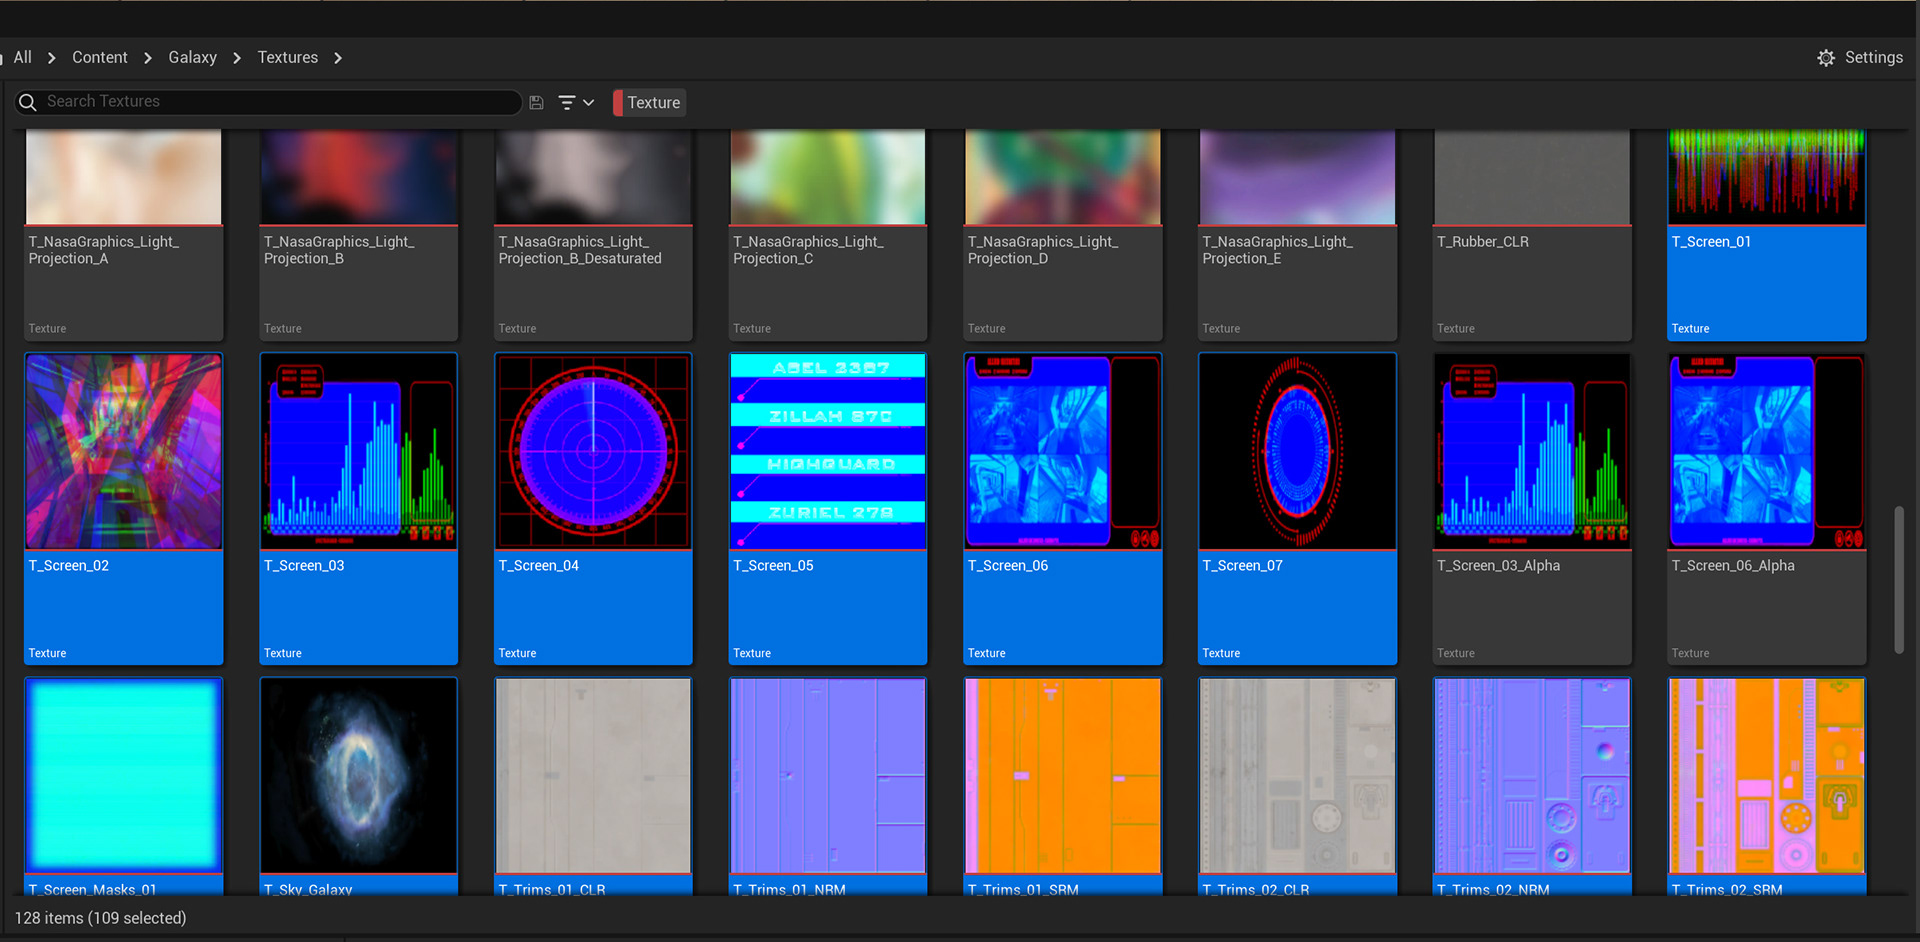
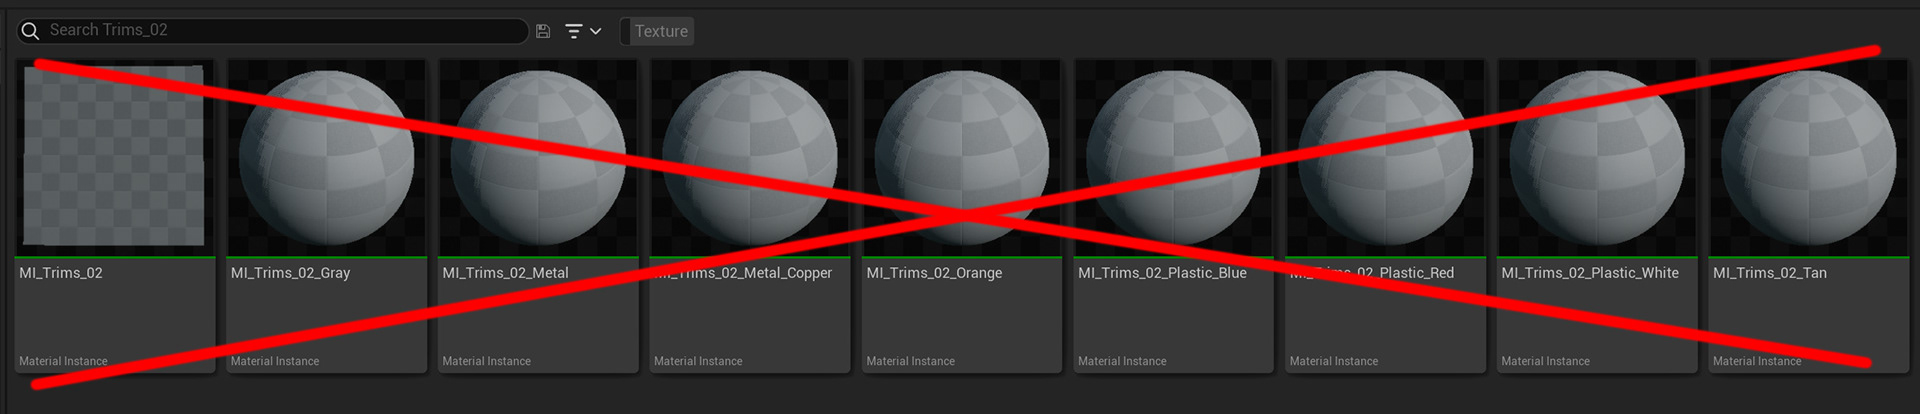
Note: This image is an example, please refer to the list above to ensure they are all de-selected.
5. Notice how I selected 109 out of 128 textures in the reference image above.
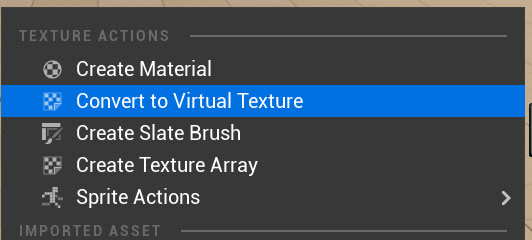
6. With the correct selection, right click-> Convert to virtual texture
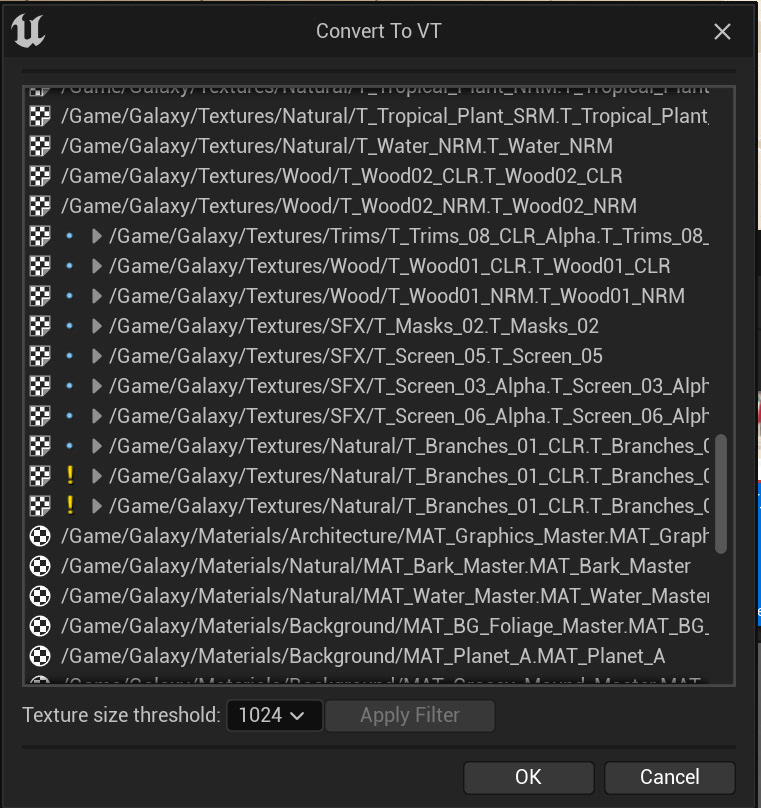
7. Select OK on the "convert to VT" dialogue box. Ignore the warning displayed as we will fix this in the next steps.
Important: This might take a few minutes to complete as this process updates both textures and related materials.
8. File->save all to ensure you don’t lose any work.
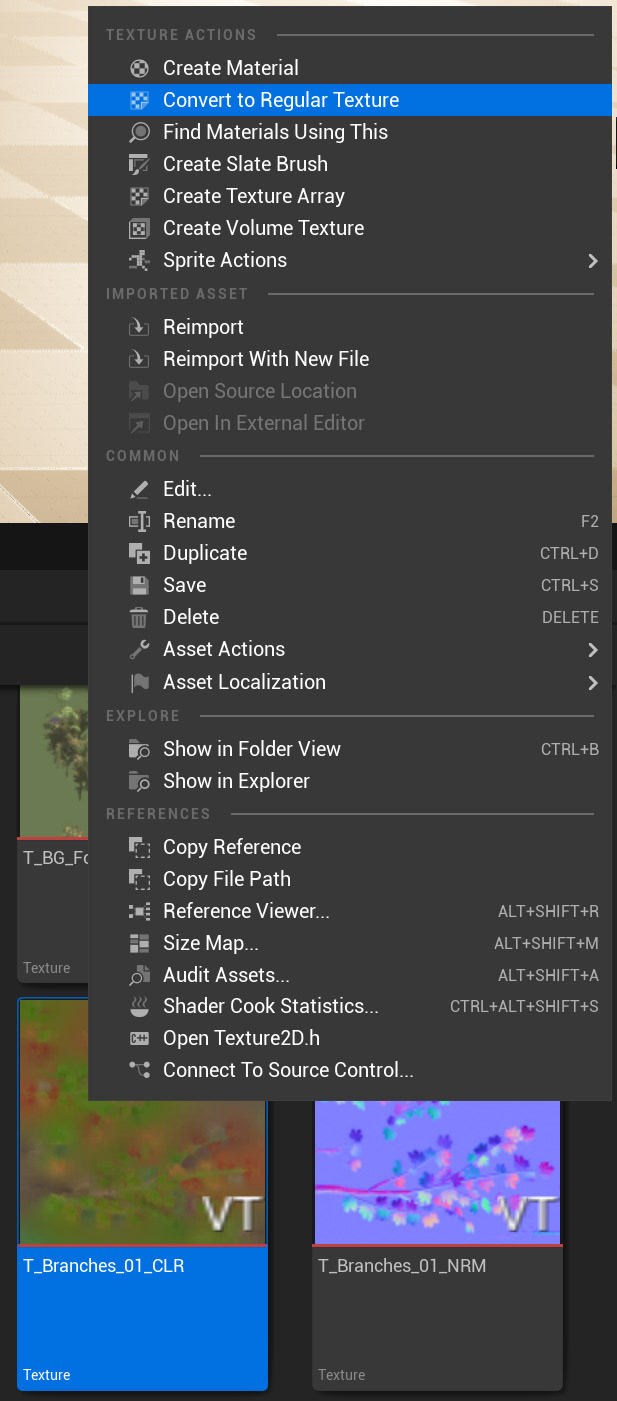
9. Bug fix: If you got the same warning in the "Convert to VT" dialogue, you'll need to check the following textures:
• T_Branches_01_CLR
• T_Screen_03_Alpha
• T_Screen_06_Alpha
• T_Trims_08_CLR_Alpha
These textures should not be virtual textures. Even though I did not select them in step 4, UE converted them anyway. To fix this, select those textures, right click and choose “convert to regular texture”, then hit OK in the “Convert to VT” dialogue, and Files->Save all after it’s done.
Testing Your Changes:
1. Remove the texture filter on the asset browser so you can see all other asset types.
2. Go through the material folders in the content browser and ensure that no materials are displayed with a gray checkerboard texture.
If checkerboard materials exist:
• Please make sure that all the textures that are not in the list are virtual textures.
• Double check the textures on the list to ensure they did not accidentally get converted into virtual textures. If they did, please convert them back to regular textures.
Important: Using the bulk property matrix may not produce the same results. The “convert to virtual texture” or “convert to regular texture” options also update materials, while the property matrix may not.
3. Please load the level called “Galaxy_Example_Map” and allow any materials to continue building if it did not previously complete the process. Once everything is loaded, ensure the foliage is displaying correctly.
4. Type the console command “r.VT.Borders 1” to display borders on virtual textures and visualize the changes. Type “r.VT.Borders 0” to remove those borders.
Bug workaround: I experienced a bug where borders persist after typing the command to remove them (r.VT.Borders 0). If you experience this issue, please restart the editor.
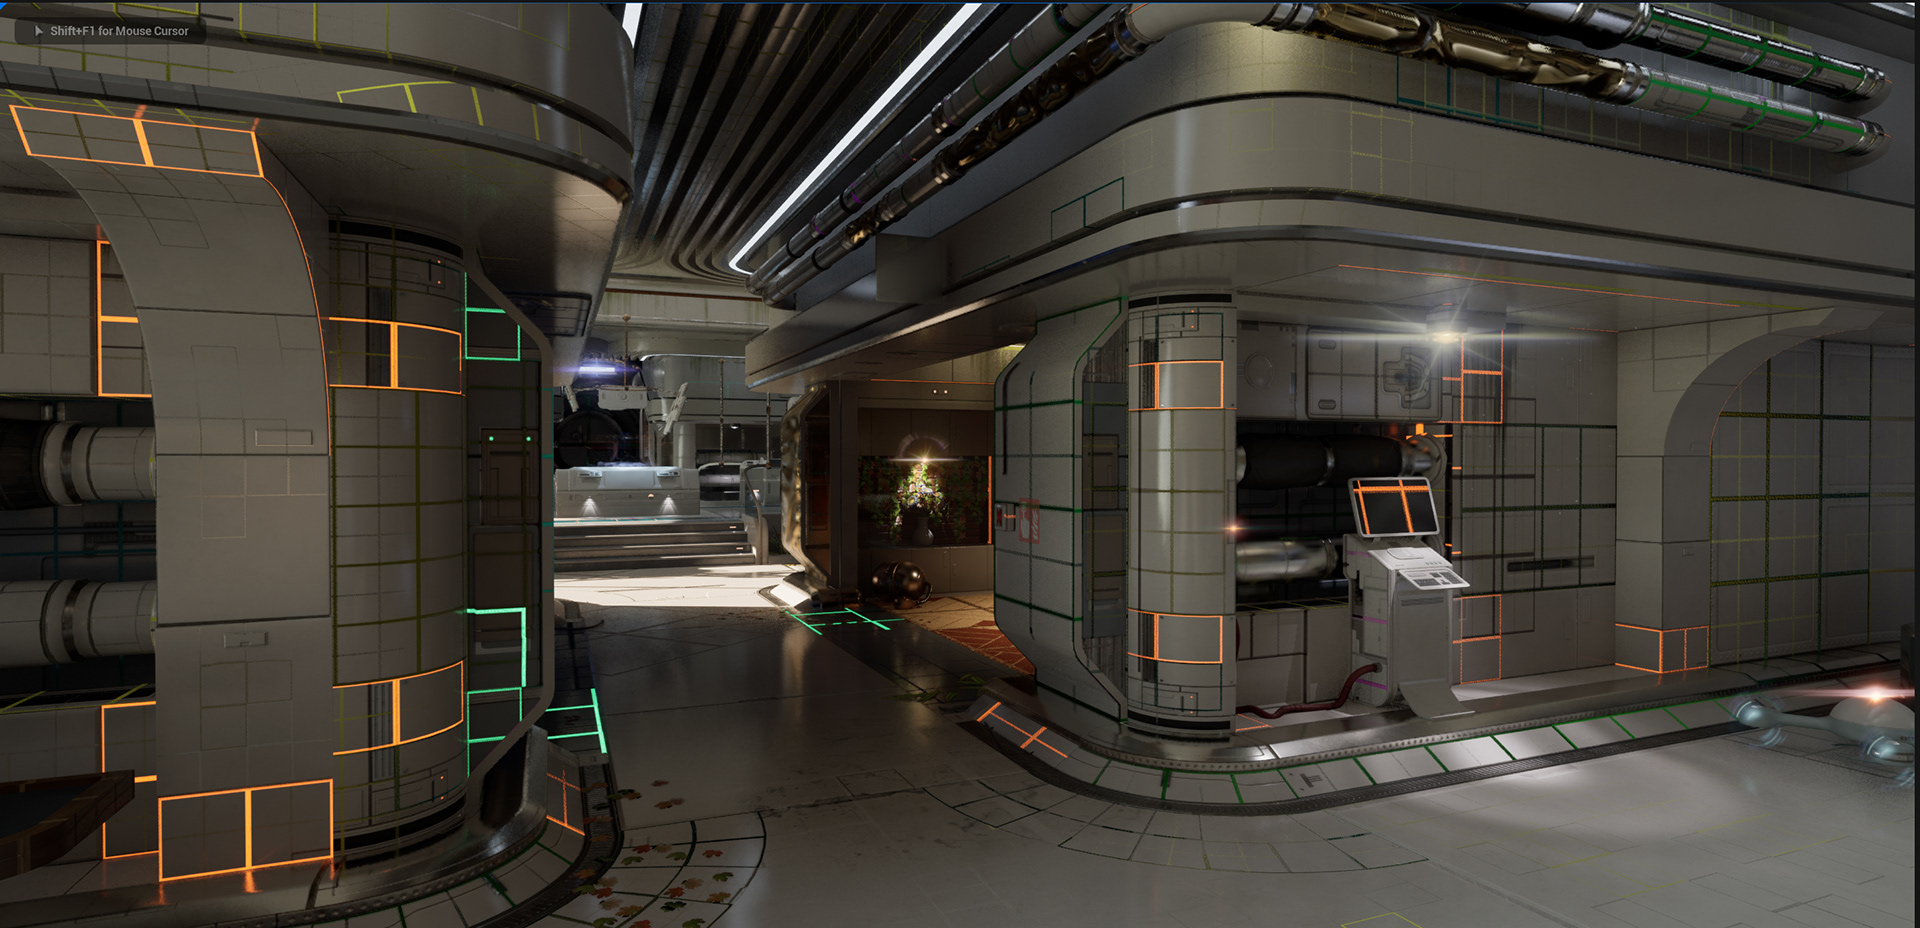
Patterns with virtual textures will be clearly visible.
Fixing Blurry Virtual Textures:
If some textures are blurry, please double check the affected materials to ensure they are not producing any errors.
If errors exist, make sure the virtual texture samples are using one of the “virtual” sample types, as shown below:

The opposite applies. Please make sure the non-virtual texture samples are not using one of the "virtual" sample types.
As a final note: Virtual textures are currently not the default in Spectrum Galaxy, the main reason being is their compatibility with masked material nodes and the need for texture duplication for all materials to work. The system makes it harder to use the material instances, as you cannot cross-pollinate between virtual and non-virtual texture node assignment.